Designing a product is a complex task. The final outcome depends largely on how well you plan out the process from the very beginning. If you’re just starting, don’t worry – you can still get great results through some simple techniques.
Product Design has become an integral part of our lives. From smartphones to tablets to watches to cars, everything around us is designed. 3D models are widely used today even though they weren’t originally intended for that purpose. Nowadays, they serve many purposes from prototyping to visualizing a project before production begins.
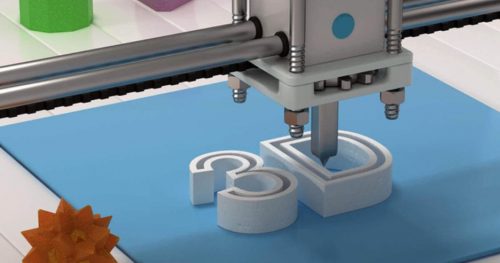
A 3D model is usually created using CAD software, such as Solidworks or CATIA. The data is then printed out into a three-dimensional solid object, which is often called a prototype. They can also be used during manufacturing as a tool for quality control.
3d modeling services
The field of 3D Computer Graphics (CG) was born over 50 years ago after the invention of the first computer. Today’s 3D CG artists work in a wide variety of industries including film, architecture, automotive design, game development, science and engineering, visual effects, and education. While many people have heard about 3D modeling services, not many know how to use software to create their models. There are numerous 3D modeling programs out there today that allow users to easily model complex objects such as buildings, statues, and even human faces. The following outline some basic steps to get you started.
Step 1 – Select Your Software
There are two primary types of 3D application packages that are commonly used; desktop applications and web-based programs. Desktop applications are installed onto your hard drive while web-based applications reside on servers located on the Internet. Desktop applications tend to have higher quality graphics than those offered by online programs, although online versions do offer some advantages. Examples of desktop applications include Adobe Photoshop, AutoCAD, and Maya. Web-based applications include SketchUp, Google Sketchup, and Blender. You should choose a program that best fits your specific requirements.
Step 2 – Understand the Basics
Once you have selected your software package, it’s time to learn how to manipulate the 3D data. Each program offers a different user interface and workflow. Understanding these basic concepts will help you move forward and begin experimenting with your 3D package. In addition, each program has its language for describing objects. Most 3D packages have similar commands and terminology, but if you’re using a specific application, make sure you understand what the options mean.
Step 3 – Learn About Drawing Tools
Learning how to draw properly is also important before moving on to modeling tools. Once you’ve mastered drawing, it’s easier to start thinking about modeling. Almost all programs offer the same basic set of tools. However, some programs give you additional options to customize your workspace. Learning how to modify the way you view things will save you time down the road.
Where do I use 3D models?
You might have heard about 3D models being used in the medical field. Because they are generally small and highly detailed, 3D models are often used where doctors prefer to drill holes and remove tumors without causing damage to surrounding organs. Other uses include creating prosthetics, replacement body parts, and even prototypes for cars, airplanes, robots, and other machines. 3D modeling services are also useful if you want to give unique gifts. Companies sell these 3D printed products in mass production, and they make nice stocking stuffers because they look good on display and provide a great keepsake.
3d modeling in product design
1. What are 3D models?
A 3D modeling in product design is a representation of a real object or situation. Models are used to represent objects, places, and environments in many different ways. A model may take the form of a drawing, diagram, photograph, map, sculpture, painting, animation, physical object, virtual world, computer game, or video. Modeling is a type of art in which two-dimensional representations are created to aid the understanding of three-dimensional reality.
2. How do I use these models?
3d modeling software is a powerful tool for designing products and processes using 3D visualization tools. You can create models of any complexity to help visualize concepts before beginning work on a project. Once developed, they can be shared with colleagues and partners to help communicate ideas more effectively.
3. Where do I get these models?
Several online platforms offer free access to a range of 3D content. These sites allow users to download and manipulate 3D models to explore their options. In addition, some content providers offer paid subscription services to allow for the creation and sharing of proprietary data.
4. What skills do I need?
Becoming proficient in the field of 3D design requires certain skill sets that can be acquired over time. As a beginner, it’s recommended to start by learning how to use basic 3D modeling software. To gain more experience, try experimenting with more advanced features. If you’re interested in learning about more advanced topics, check out our course offerings.
Rendering
After you’ve saved your final design, it’s time to render it. To render your design, you need to plug your computer into a power outlet, turn on your monitor, and start-up Blender. On your keyboard, press TAB to enter text input mode. Type “render,” without quotes. Press Enter to exit the text input mode. Now type “cube.” Press Enter again.
This final command tells Blender to begin rendering your model. You will notice that nothing seems to happen. Don’t worry, this takes a while to complete. Just sit tight and leave your computer alone. After a few minutes, your preview window will appear. It will show you a cube spinning around. As long as no errors pop up, you’re good to go. If you happen to scroll over the red area of your screen, you will see an error message stating that the file cannot be opened–which means your file was corrupted somehow. Ignore this and keep pressing Enter each time you see this message. Keep doing this until the entire scene renders completely. Here is what your final rendered image should look like. Save the file as a.png file with a transparent background. You can now take this final image and transfer it to the website of your choice.
Interesting Related Article: “What to look for in a 3D printing service“