Yes, there are curls, and then there are CURLS, if you know what I mean. And there are many styling tools you can use to create these curls.
However, if you could only afford one, I’d say go for the good old hair straightener. Your hair straightener is one of the most straightforward tools to use in styling perfect bouncy curls.
This article will provide you with a simple guide for achieving those red carpet-worthy curls with just your straightener. So let’s get started, shall we?
Easy Way to Curl Your Hair with a Straightener
Whether you are trying out curling your hair yourself for the first time or have struggled and failed to get those perfect curls, this guide is for you. You will find helpful tips to ensure that every curl is perfect.
Prep Your Hair
You always want to start all your styling sessions with a clean head of hair. So, grab your shampoo off the shelves and scrub away at your hair.
Make sure your shampoo is a mild one with no sulfate in it – sulfate strips your hair of the much-needed moisture and leaves it looking limp and dull.
After washing your hair:
- Trim the split ends.
- Don’t be tempted to keep those bad ends because not only will they ruin your look; they will damage your hair even more.
- Once you are done, apply a nourishing conditioning mask, wrap your hair with a steam cap and allow it to sit.
The purpose of this is to get the much-needed nutrients into your hair follicles to be healthy and lustrous.
Section Your Hair
After your treatment, it is time to section off your hair into smaller bits. Take even sizes around your head – I divide my hair into four sections and hold each down with a hair clip. However, if your hair is thick, you will need to apportion your hair into as many as six sections.
These small sections make your hair more manageable and make it easier for you to work out the knots. Detangle your hair with your fingers or a wide-tooth comb.
Apply a Lightweight Heat Protectant
Your straightener is a heat styling tool, so you need to ensure your strands are well protected from the adverse effects of the heat. Apply a bit of the hair protectant and mousse to each section of your hair and clip back.
Heat Your Hair Straightener
To speed up the styling process, I advise that you plug in your hair straightener and leave it to get warm. Ensure that your iron temperature suits your hair type; you don’t want to use extreme heat for thin hair – it will break and look very dull. For normal hair type, you can set the straightener to 300-380℉.
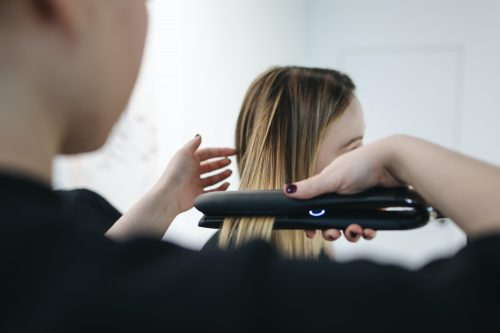
Curl Your Hair
Now that the iron is hot enough, take a small bit of hair from the clipped section at the back of your hair and clamp down on it at the root with the straightener. With the iron still clamped, work your way slowly from the roots of your hair to the tip, turning the iron slowly on itself in a half turn. Repeat this until you are done curling all the sections.
Techniques for Curling Hair with Hair Straightener
Alternate Flicks and Curls
For this technique, start with a small width of your hair, at most 2 inches wide and clamp down the straightener at the roots. Keep the pressure from the roots to the middle of your hair before turning the iron slowly in a half-circle.
Keep the iron clamped down this way and move it slowly in the U-shape back down to the roots. If you want more pronounced curls, move the iron down to the root faster.
Full Turn
If you want more pronounced curls like the ringlet curls, the flick and curl technique may not cut it for you. In that case, you should rotate your iron in a complete turn and not a half-turn or U-turn.
So start at the base of your hair. But be careful not to place the straightener too close to your scalp, so it doesn’t burn. Clamp down and gently pull the straightener up slowly till you reach the portion where you want the curls to start.
At that point, you should turn the iron entirely to get those juicy ringlet-y curls.
Juicy Tips to Help You Curl Your Hair Perfectly With a Straightener
Once you have the proper tools and styling technique, nothing can stop you from getting that salon-worthy curly hair from the comfort of your home. These tips will help make the entire process smoother.
- Be consistent in the direction of your curls. Don’t move it under the first time and switch direction the next; you will only end up with curls in opposite directions. It is not a picture-perfect moment.
- Always use a heat protectant to ensure your hair has a barrier between it and the heat.
- Section your hair for even curl patterns.
- Don’t set the straightener heat too high! You will fry your hair.
Bonus Tip: Best Hair Straightener to Use for Curling Hair
A word of advice here – you can only achieve great curls if your straightener is designed to create the curls.
For example, using a flat, paddle-style straightener to curl your hair will get mediocre results because the iron is not intended to hold and wrap the hair efficiently.
The same thing goes for any straightener that has a plate to handle width of less than 2.5cm – it is just too small.
The better the iron you use, the faster the entire styling process is for you, and the easier it is for you actually to curl your hair perfectly!
Conclusion
Curling your hair with a hair straightener is way easier than it looks. Trust me; once you follow the steps in this article, you will have people all around complimenting you. Try it out today.
Interesting Related Article: “4 Steps to a More Efficient Beauty Salon“