An OBD2 scanner can save you some money. Sometimes we would rather not hear the bad news that we need to replace an EGR valve sensor, or some part, which may appear strange to our hearing for the first time. Still, knowing precisely what is wrong with your vehicle will save you a visit to a mechanic.
 What if I told you—you can deal with your car problems directly, without having to purchase a high-end device? For this guide, I’ll be using an Ancel AD410 scanner.
After you purchase your first OBD2 scanner, it is completely understandable to feel a bit intimidated. Navigating the menu of your scanner shouldn’t be a problem, as it is rather intuitive.
Nevertheless, you may have difficulties understanding weird sequences of numbers and letters that may appear at times. So sit back, and let this article guide you on how to use an OBD2 Scanner!
Getting started
Insert the OBD2 scanner into the DLC, which stands for Diagnostic Link Connector. Usually, it is located on the left side of the dash. If you are unsure where to find it, you can check the user manual for your car or, you can simply type in the model and the year of your car on the internet.
If it’s not working, try to unplug it and plug it in once again. Sometimes the DLC connector pins may cause problems. Try to firmly plug the cable, but don’t use too much strength – you don’t want to break any of the pins! After you are sure that the cable is correctly plugged in, the screen of your scan tool should signal that it is connecting—-connected with the vehicle.
What now
Once it is connected, the screen will display six different options to choose from. From the top left, the first option is “OBDII”. You can check all of your codes here. “I/M,” tells you about potential engine misfires. “Setup” is pretty self-explanatory – it allows you to change language, the unit of measure, turn the beep on and off, record, or receive feedback.
“Lookup” allows you to check what the meaning of codes are, as you’ll be given a series of characters, for example, “P0300”, which stands for “Random/Multiple Cylinder Misfire”. “Review” allows you to review any information that you have stored on the scanner. “About” simply tells you the current version of the scanner’s software and hardware. With the use of USB, you can connect your scanner to the computer and update its software to the newest version.
After you start the car and click on “I/M”, if there are no problems detected, you’ll see green checkmarks next to the abbreviations of different systems. You can then click on “On-Board Monitoring” to see the status of particular components.
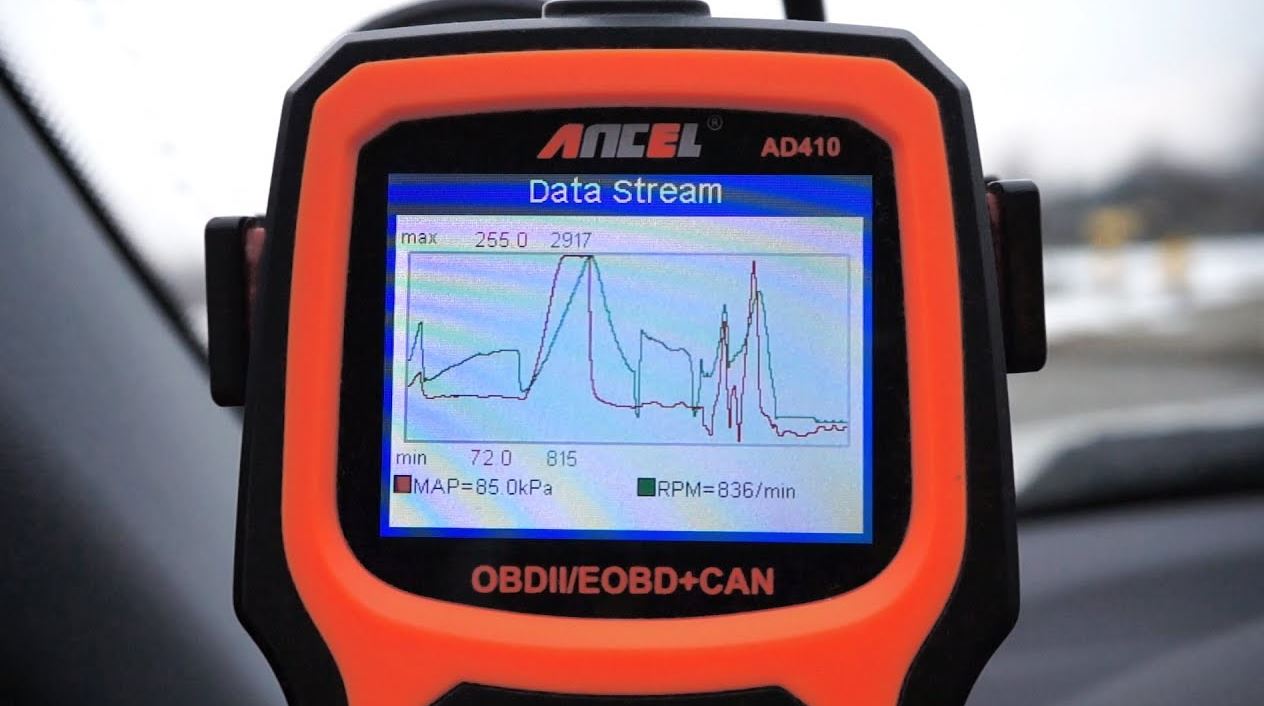
After clicking “Datastream” and then “View all items,” this will allow you to see every single thing within the scope of your scanner. After you choose several metrics, the program will automatically generate a graph based on live data.
If for some fortunate reason everything in your car is working correctly, you can try disconnecting a few things and then trying again. After you do that, click on “read codes”, then “impending codes” and you should see a code indicating that something is wrong.
Typically, the information about the malfunctioning element would be more stressful. You would have to face the possibility of having to replace a part that you know nothing about.
Usefulness
The scanner itself is easy to use, although as you can see, there are things which will need decoding. Don’t worry; you can check the explanation of codes online or in the manual. The price isn’t too high – the model that I’m describing costs about 40$ on Amazon. It is a one-time payment, that will save you both money and time on numerous trips to a mechanic.
The surprising number of features can be pretty intimidating at first, but remember that learning how to diagnose what is wrong with your car properly takes years. Problems with a particular component can elicit several different codes.
Alternatively, problems with a component x can be caused by malfunctioning component y. The device won’t be able to detect that; you’ll need to know the relationship between different parts of your car. It will take some time before you get familiarized with all the different options, but it can be pretty rewarding if you want to expand your knowledge.