 Electric linear actuators have served as linear motion automation mechanisms in various spheres for decades. And wanting to simplify the process of their work and somehow ease their implementation for the future, the actuator control units like control boxes, rocker switches, hand & foot remotes, and relays with their control modules were invented.
All these innovations forced manufacturers, explorers, inventors, and even young startup leaders to turn their attention to the broad variety of electric linear actuators and to the benefits they are providing wherever they are installed.
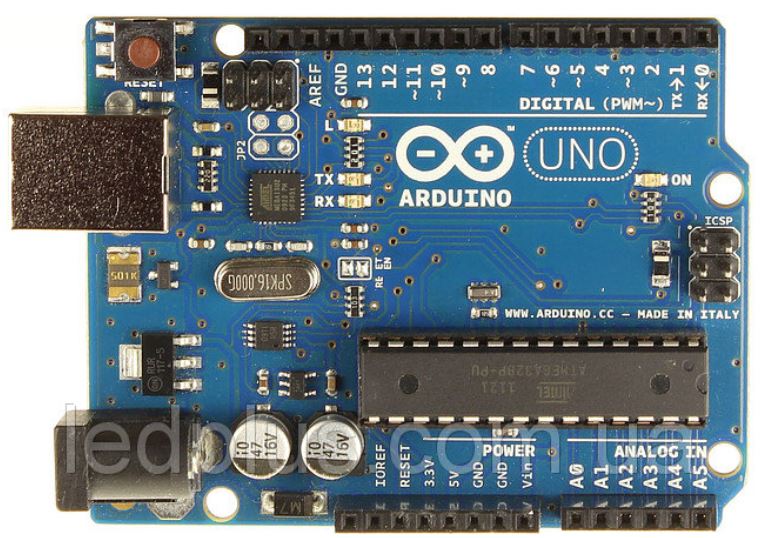
The Arduino microcontroller
There is one specific actuator control unit which must be highlighted, as it complements the work of every electric linear actuator it is used alongside. This is the Arduino microcontroller, which is capable of making linear motion automation very easy and provides few extremely important additional functions, except for just mere linear motion forward and back.
In fact, Arduino is nowadays one of the most popular microcontrollers used for linear actuators automation. There are several alternative and analogs in the global marketplace. However, only real Arduino microcontrollers guarantee the safest and most reliable performance for your electric linear actuator.
Furthermore, learning how to use the Arduino is extremely simple as it is always supplied along with all the relevant documentation and manuals. As a sizeable community supports this microcontroller, users around the world can get qualified, timely support. Arduino microcontrollers are the intelligence that will provide good service to your linear actuator, making it work properly according to the blueprint you always wanted.
Arduino – open source community
Given that Arduino is open source, and its microcontrollers are digital and analogue at the same time, their implementation potential is significantly greater than with other similar microcontrollers. These microcontrollers can be connected to both analogue and digital devices easily. This microcontroller type can also interface with numerous circuits simultaneously. Arduino microcontrollers usually come already pre-programmed with a concrete program.
Each microprocessor has its own operating system. They are also equipped with a standardized USB port. This simplifies the moving of necessary programs from a computer to the microprocessor itself. Arduino microcontrollers can be used with H-drives and motor drives.
However, here are two more ways to utilize Arduino microcontrollers when using them along with electric linear actuators. One is to use the relay for the direct current control supplied to the actuator. Another means creating a closed loop with the use of a specific 12V feedback electric linear actuator.
The relay method is the easiest and the most reliable, especially for people who deal with linear automation technology for the first time. The right relay for this task must have three contacts: Common, Normally closed, and Normally open.
Fully automated control of the electric linear actuator with the Arduino microcontroller requires two relay units to enable the actuator to start, stop, and change direction of movement. Two linear actuator wires have to be connected to the relay two at a time. Relays for actuators control should have up to eight pins. Their numbers can vary depending on the model of the relay.
A 5V current supply will be enough to power the relay. The power supply source must be connected to the relay and lined up with GND and VCC pins.
All IN pins must be correctly connected to the corresponding Arduino pins.For special adjustments of the Arduino microcontroller, it is also possible to find suitable pieces of code on the Internet to paste inside, and use them to achieve better electric linear actuator performance.