Wondershare Filmora has established itself as a popular choice for video editors, offering an intuitive interface and powerful features. While many users are familiar with its basic and advanced tools, several hidden features can significantly enhance their editing experience. In this article, we’ll explore ten lesser-known but powerful features of Filmora and provide tips on how to use them effectively.
Audio Ducking for Professional Voiceover Quality
What is Audio Ducking? Audio ducking allows you to automatically lower the background music volume when there’s a voiceover or dialogue, ensuring that the speech is clear and easily heard.
How to Use It
- Import your video and audio files into Filmora.
- Drag the voiceover or dialogue track to the timeline.
- Select the background music track.
- Right-click and choose “Adjust Audio” or click the audio settings icon.
- Enable “Audio Ducking” and adjust the sensitivity and volume reduction as needed.
Additional Tip
Use audio ducking to maintain sound balance in your videos, particularly in interviews, vlogs, or any content with both speech and background music.
Motion Tracking for Dynamic Videos
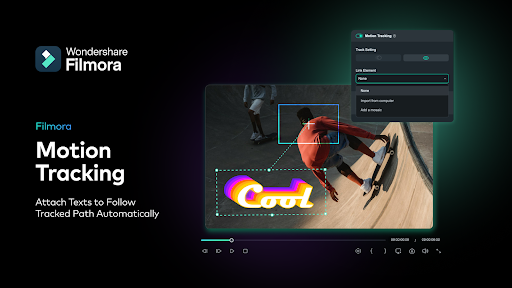

Motion tracking allows you to track a moving object in your video and attach elements like text, images, or effects.
How to Use It
- Import your video and place it on the timeline.
- Select the video clip and click the “Motion Tracking” button.
- Draw a box around the object you want to track.
- Click “Start Tracking.”
- Attach an element to the tracked object by selecting “Attach Object.”
Pro Tip
Use motion tracking to add dynamic elements to your videos, such as captions that follow a person or special effects that move with an object.
Color Matching for a Cinematic Look
Color matching allows you to match the color tones of different clips for a consistent look and feel throughout your video.
How to Use It
- Place the clips you want to match on the timeline.
- Select the clip you want to match and click the “Color” tab.
- Choose “Color Match” and select the reference clip.
- Adjust the intensity and apply the match.
Pro Tip
Use color matching to ensure visual consistency in your videos, especially when combining footage from different sources or lighting conditions.
Video Stabilization for Smooth Footage
Video stabilization helps reduce camera shake and smooth out footage, making it look more professional.
How to Use It
- Import the shaky video clip to the timeline.
- Select the clip and click the “Stabilize” button in the editing toolbar.
- Adjust the stabilization settings and click “Analyze.”
Use for Handheld Shots
Use video stabilization for handheld shots or footage captured in dynamic environments to improve the overall quality and viewing experience.
Green Screen (Chroma Key)
The green screen feature allows you to replace a solid-colored background with any image or video, creating special effects or immersive environments.
How to Use It
- Record your subject against a solid-colored background.
- Import the video and the background image/video to Filmora.
- Place the background on the timeline, then overlay the green screen video.
- Select the green screen clip, click “Effects,” and apply the “Chroma Key” effect.
- Adjust the settings to remove the background color and reveal the new background.
Uses of Green Screen
Use a green screen to create imaginative backgrounds, simulate different locations, or add interactive elements to your videos.
Custom Command Shortcuts
What are custom shortcuts? Custom shortcuts allow you to personalize keyboard shortcuts for various commands, enhancing your editing efficiency.
How to Use It
- Go to “File” > “Keyboard Shortcuts” or press “Ctrl + Shift + K” (Windows) / “Cmd + Shift + K” (Mac).
- Customize the shortcuts according to your preference.
Pro Tip
Set up custom shortcuts for frequently used commands to speed up your editing workflow and increase productivity.
Proxy Editing to Reduce Resource Loads
What Is Proxy Editing? Proxy editing creates lower-resolution versions of your high-resolution clips, making the editing process smoother and faster, especially on less-powerful computers.
How to Use It
- Import your high-resolution video clips.
- Go to “Preferences” > “Performance.”
- Enable “Create Proxy Files” and set the desired resolution.
- Edit your video using the proxy files, and Filmora will automatically replace them with high-resolution clips when you export them.
Tips for a Smoother Editing Experience
Use proxy editing for 4K videos or high-resolution footage to prevent lag and ensure a smoother editing experience.
Screen Recording for Gameplay
Filmora includes a built-in screen recording feature, allowing you to capture your screen activity for tutorials, gameplay videos, and more.
How to Use It
- Go to “File” > “Record Media” > “Record PC Screen.”
- Adjust the recording settings and select the capture area.
- Start recording and save the footage directly into your Filmora project.
Uses of Screen Recording
Use screen recording to create educational content, create software demonstrations, or capture gameplay highlights.
3D LUTs (Look-Up Tables)
What are 3D Look-Up Tables? 3D LUTs are predefined color grading presets that can give your videos a cinematic look by applying complex color transformations.
How to Use Them
- Import your video and place it on the timeline.
- Select the clip, go to the “Color” tab, and choose “3D LUT.”
- Browse and apply a LUT from Filmora’s library or import a custom LUT file.
Tip
Experiment with different LUTs to find the perfect color grade for your project, enhancing your videos’ visual storytelling and mood.
Speech-to-Text for Subtitles
The speech-to-text feature automatically generates subtitles by converting spoken words in your video into text.
How to Use It
- Import your video with spoken content and place it on the timeline.
- Go to the “Text” tab and choose “Speech-to-Text.”
- Select the audio track and click “Convert.”
- Review and edit the generated subtitles as needed.
Make your Videos more Accessible
Use speech-to-text to add subtitles quickly, making your videos more accessible and engaging for viewers who may need or prefer reading along.
Conclusion
Filmora has hidden features that can take your video editing to the next level. From audio ducking and motion tracking to green screen effects and proxy editing, these tools offer powerful capabilities that are easy to use. By exploring and utilizing these lesser-known features, you can enhance your videos’ quality and efficiency, making your editing process more enjoyable and productive.
Whether a beginner or an experienced editor, Filmora’s comprehensive set of tools empowers you to create professional-looking videos easily. So, dive into these hidden gems and see how they can transform your video projects!
Interesting Related Article: “Creating Compelling Content with Social Media Video Production“