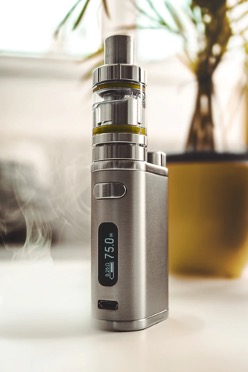
The excitement of opening a new vaporizer and enjoying the bold and delicious flavors is unparalleled. The shiny, sleek device never fails to capture the heart with its aesthetics, efficiency, and impeccable performance. Give it two months, and the sticky dirt deposit will make the device act old and miserable.
Residue accumulation overtime from the e-liquids can hinder the performance of the device in several ways. They could gunk up the coil, the battery connectors, burn the wick, and cause a bad taste in the vapor. Sometimes even a new device comes with a machine oil smell that could induce an odd flavor to your vapors.
So how do we curb this problem? Well, using a clean vape is the simplest and the most efficient way to enjoy your vaping experience. And here is an easy cleaning guide for your vape devices to keep them in great shape.
Cleaning One- Piece Vape Devices
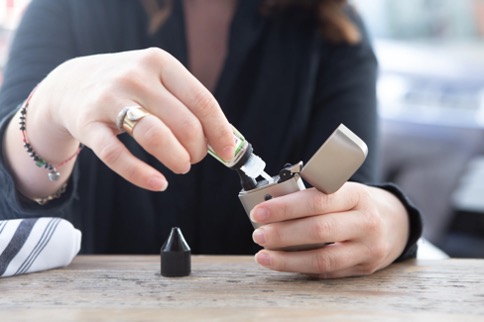
There are several top quality pods intended for novice users that typically come in a one-piece design without any removable parts. Cleaning these devices can be slightly trickier than other vaporizers, but not impossible.

Take necessary precautions to ensure that the water does not enter your pen’s main electronics while cleansing the device. The best way to ensure this is to use a Q-tip for cleaning the tank thoroughly. You can dip the Q-tip in water or propylene glycol and clean the tank to eliminate the gunk effectively. Follow this with a dry Q-tip cleaning to remove any residue liquids in the system before use.
Cleaning Your Vaporizer
The first step to cleaning your vaporizer module is to understand the anatomy of the device. Most pen-style devices have three crucial elements that can be typically removed and cleaned. They are as follows:
The Battery – The power source for your device that influences the voltage and temperature.
The Coil – The heating element that transforms the power into heat for the wick to vaporize.
The Tank – The container which holds the vape juice that needs to be vaporized.
Each of these parts requires special cleaning to ensure the proper functioning of the device.
The Battery
The battery segment of your device requires thorough cleaning to ensure complete connectivity to the device. Over time the connectors accumulate dirt that reduces the surface area of the battery that’s in contact with the connector. It could reduce the power delivery of the module and increase the stress on the battery. Using a Q-Tip, clean the connectors properly for best performance.
The Coil
Coils play a crucial role in a vaporizer. Gunked and old coils can affect your vape’s quality and flavors terribly and produce a burnt taste. It’s good to know that you can now buy smok coils online
There are two major types of coils – rebuildable coils that require installation and wicking by the user, and replaceable coils where the coil is encased in a metal chamber along with a wick. Each of these coil types requires different types of cleaning processes.
Rebuildable Coil
- Start by removing the wick from the coil to avoid damaging it.
- Pulse the power button of your device to dry burn your coil. Make sure not to glow them for a long time to avoid damage.
- Separate the atomizer from the mod and keep it under running water.
- Using a toothbrush, lightly brush the coil. Alternatively, you can use a coil cleaning kit.
- Rinse the system again and dry burn to remove any residue droplets.
You can add a few drops of dishwashing liquid while brushing with the cleaning tool to remove the oily or sticky residue.
Replaceable Coils
Replaceable coils typically come in sub-ohm tanks, and cleaning under running water may not be completely effective. You can follow the soak and rinse method to remove the dirt and oil residue from the coil and wick.
- Place your coil in a dish containing vinegar or ethanol. Let the coil soak in the liquid for a couple of hours.
- Remove the coil and rinse under running water and then in distilled water.
- Blow-dry the coil to remove any water droplets present in the intricate parts of the system.
- Let the system air dry completely before use.
Alternatively, you can use cheap vodka to soak the coil for effective cleaning.
The Tank
Basic Cleaning
If you feel like your tank is relatively clean, then a simple hot water rinse should help remove the sticky dirt particles and clean the system.
- Remove the tank from your device and place it under running water.
- Place a bowl of water in the microwave and heat for about 2 minutes.
- Place the parts in the bowl and wait till the water gets cold.
- Use a paper towel to dry the tank and air dry to eliminate traces of water.
You can also blow-dry to remove any water droplets from the sides of the tank. Be careful not to use too much heat to avoid any damage to the O-rings. If you are a beginner then must check out the best vape pen for beginners.
Deep Cleaning
Deep cleaning your tank will require some effective cleaning agents that can remove the oily residues. You can use baking soda, ethanol, vodka, or vinegar for the process.
- Remove the tank from the device and place it in a bowl containing the cleaning agent. Let it sit for a few minutes.
- Remove and rinse the tank under running water.
- Use a paper towel, followed by a blow-dryer, to prepare the tank for installation.
You can also use propylene glycol, dish soap, or lemon juice as cleaning agents.
Ultrasonic Cleaning
If you are a regular vaper, investing in an ultrasonic cleaner can be the best way to keep your devices clean. Ultrasonic cleaners are used for cleaning precious metals and jewelry and can work miracles with atomizers as well.
- Fill the cleaner with water.
- Place the tank inside and run a 10 minutes cycle.
- Rinse the part under running water and air dry before use.
How Often Should I Clean my Vaporizer?
Try to keep up with a simple cleaning routine once every week, followed by a thorough cleaning routine once every three weeks. The process will keep every part of your vaporizer clean and well maintained, which can enhance its lifetime. Also, it gives you a chance to identify any damaged parts such as a burnt coil, and replace them on time. You can also clean your system if you sense an odd taste while vaping.
Conclusion
These tips can help you clean every part of your vape device to get rid of dirt and deposits. Maintaining your device with proper cleaning and replacements can make vaping a budget-friendly and enjoyable hobby. A clean device will give you a better flavor and nicotine hit, thus making it a fun and flavor-filled experience.
Interesting Related Article: “Electronic Cigarettes | Everything You Need To Know Before You Start Vaping“