Big Data depends on databases. In fact, without a powerful, enterprise-ready database there’d be no “data” in Big Data. Because of the scale required for these applications, a regular relational database (such as MySQL) doesn’t quite cut it. To that end, you need a fault-tolerant NoSQL database that can handle a massive amount of information.
One such database is CouchDB, a free, open-source NoSQL database that is maintained by the Apache Software Foundation. This enterprise-grade database focuses on ease of use and scalability. CouchDB stores its data in named databases which contain JSON-structured documents that consist of fields and attachments. Each document maintains its own data and self-contained schema.
CouchDB also offers outstanding replication and synchronization capabilities, which helps to make it an ideal database solution for mobile device apps, applications with accumulating data (such as CRM and CMS systems), and similar service-based needs.
Many software development companies know full-well the benefits of deploying the CouchDB database. And so, with that in mind, I’m going to walk you through the process of installing this NoSQL database on the Ubuntu Server 18.04 platform.
What You’ll Need
The only things you’ll need for this to work are:
- A running instance of Ubuntu Server 18.04.
- A user account with sudo privileges.
Updating and Upgrading
The first thing to be done is to update and upgrade your instance of Ubuntu Server. It’s important to remember that if the kernel is upgraded you will have to reboot the server.
To run the update/upgrade process, log into your Ubuntu server and issue the following two commands:
sudo apt-get update
sudo apt-get upgrade -y
When the upgrade completes, reboot the server (if the kernel is upgraded) and log back in.
Adding the Repository
CouchDB can’t be found in the standard repositories. Because of this, you must manually add a repository before CouchDB can be installed. To do this, you must first add the CouchDB GPG key with the command:
curl -L https://couchdb.apache.org/repo/bintray-pubkey.asc | sudo apt-key add –
Once you’ve added the GPG key, add the CouchDB repository with the command:
echo “deb https://apache.bintray.com/couchdb-deb bionic main” | sudo tee -a /etc/apt/sources.list
Installing CouchDB
With the key and the repository installed, you can now install CouchDB. First, update apt with the command:
sudo apt-get update
Finally, install CouchDB with the command:
sudo apt-get install couchdb -y
During the installation, you’ll be asked to select the server configuration type that best meets your needs. You will first need to tab down to Ok (Figure 1) and then hit Enter on your keyboard.
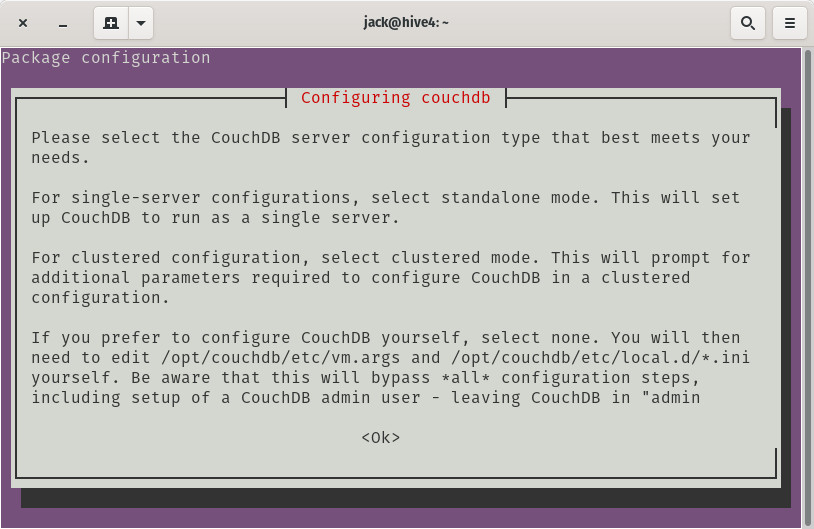
An explanation of configuration types.
In the next window (Figure 2), you can select from a standalone, clustered, or none configuration.
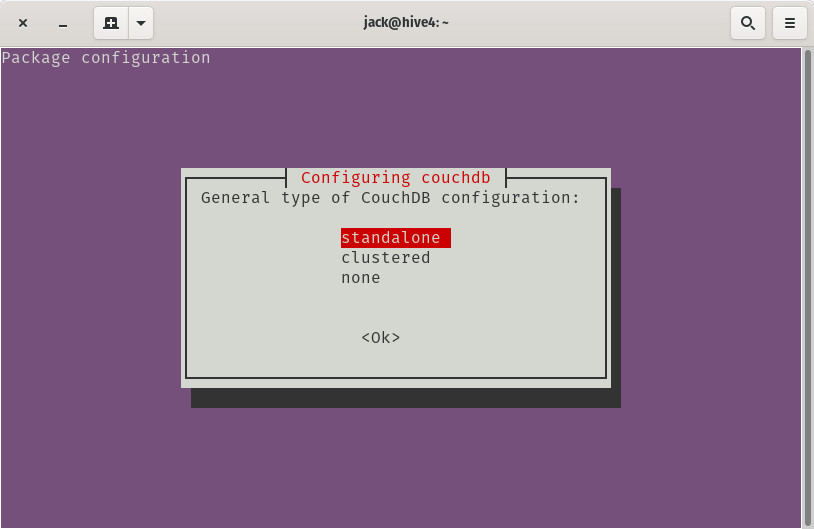
Selecting your server type.
If you will only be using CouchDB on this one server, select standalone. If you plan on clustering a number of servers together (such as if you were to be using this database server for software development outsourcing), select clustered. Since this is your first CouchDB server installation, select standalone and tab down to Ok. Hit Enter on your keyboard and the installation will continue.
In the next window, leave the default IP address of 127.0.0.1 (Figure 3).
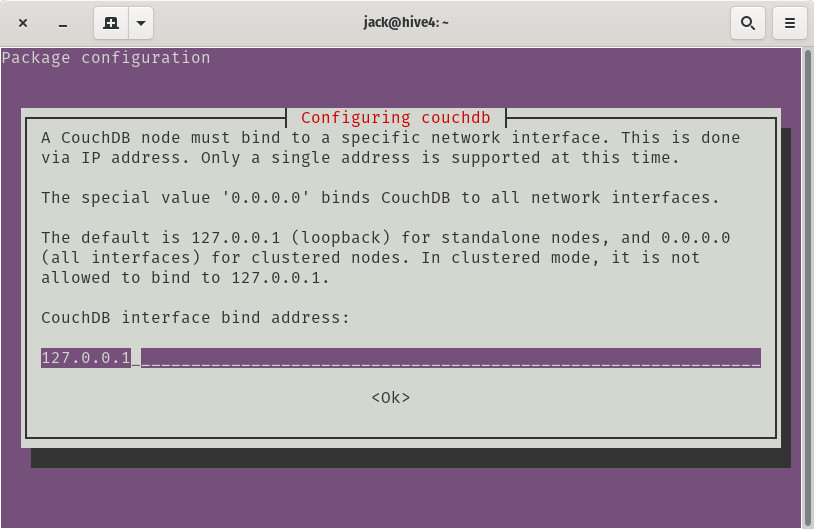
Leave the default IP address.
Tab down to Ok and hit Enter on your keyboard.
Next, you need to create a password for the CouchDB admin user (Figure 4).

Adding a password for the admin user.
Make sure to use a strong, unique password for the admin user, otherwise, you could run the risk of your data being compromised. You will then be asked to repeat the password for verification. Once again, tab down to Ok and hit Enter on your keyboard.
And that’s the end of the interaction for the installation of CouchDB. The installation will finish up and bring you back to the terminal prompt.
Verify Your Installation
When the installation completes, you can verify it by issuing the command:
You should see a “Welcome” message along with version numbers and a bit more information (Figure 5).
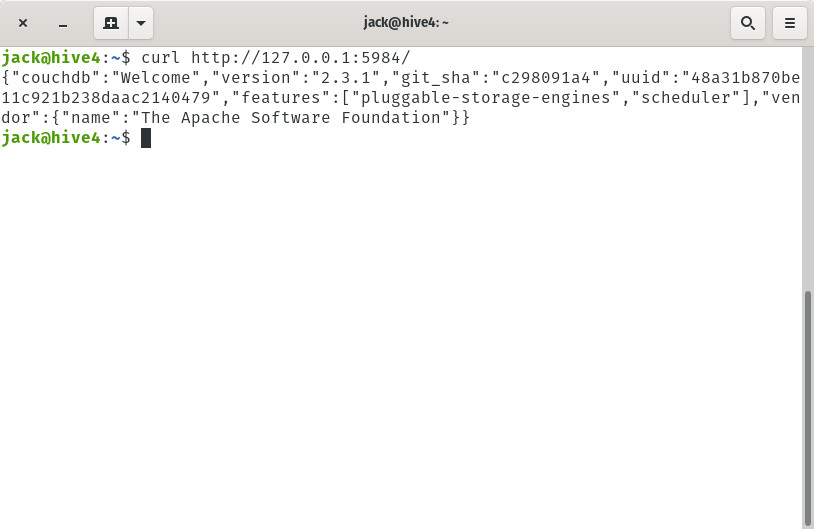
CouchDB is installed.
You can also access the built-in CouchDB web-based interface. However, in order to do that, you must change a configuration. Issue the command:
sudo nano /opt/couchdb/etc/local.ini
In that file, look for the line:
;bind_address = 127.0.0.1
Change that to
bind_address = 0.0.0.0
Scroll down to the bottom of the file and change the mysecretpassword entry (Figure 6) to a unique, strong password and remove the leading ;, so the entry looks like:
admin = PASSWORD
Where PASSWORD is your unique and strong password.
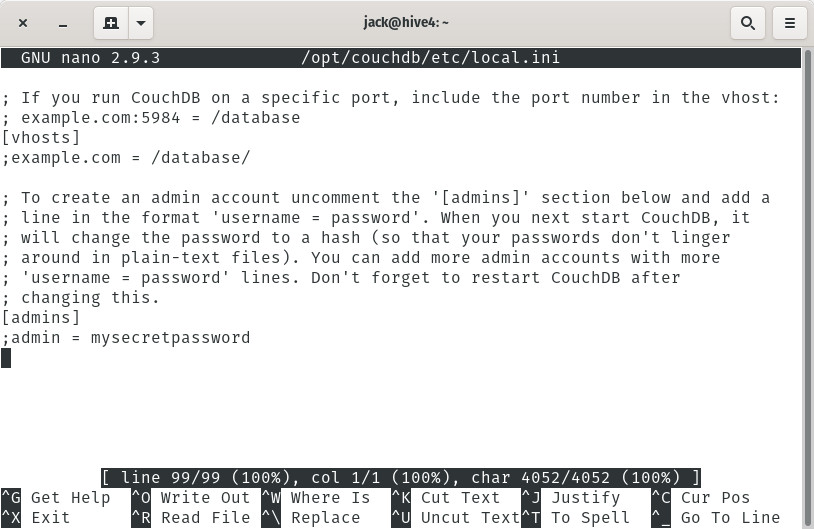
Changing the admin password.
Save and close the file.
Restart CouchDB with the command:
sudo systemctl restart couchdb
Finally, point your web browser to http://SERVER_IP:5984/_utils and you should be presented with a login prompt. Login with admin as the user and the password you added to the local.ini file.
Congratulations, you’ve successfully installed CouchDB on Ubuntu Server 18.04, and you have access to a user-friendly, web-based interface with which you can start creating your first NoSQL databases.
Interesting Related Article: “Common Causes of Database Security Breaches“