It is actually wild just how many of us are not wearing the right bra size. Most of us would think that wearing the right bra is easy, but the chances are you actually have it all wrong.
There are some tell tale signs that will show you just how incorrect your size is. Knowing the guide to bra sizes biggest to smallest can help, however, if you are not sure what your size could possibly be, you will need a bit of help.
What does not help is just how much bra sizes fluctuate between brands. You could be a D cup in one store and a B cup in another. It is really frustrating, and with it being so hard to manage so many women are not wearing the right sizes anymore.
So, how can you measure your bra size at home and get an idea for what you should be wearing?
How To Tell If You Are Wearing The Right Size?
What are the signs that your bra is not the right size for you? Well, here are some tell tale signs that will show you that your current size is wrong for you!
- Underwriting poking breast sides.
- Spillage.
- Hiking up when you lift your arms.
- Bra band rides up.
- Cup wrinkling.
- Slipping straps.
Do not forget that weight loss and gain, pregnancy, exercise, and changes in diet can make you change bra size. You should head to a professional bra fitter if you can, and get a proper fitting if you are really unsure of what your size is.
However, you can also get the tape measure out and do it yourself.
Let’s tell you how!
Figuring Out Your Size
It’s time to figure out your true bra size!
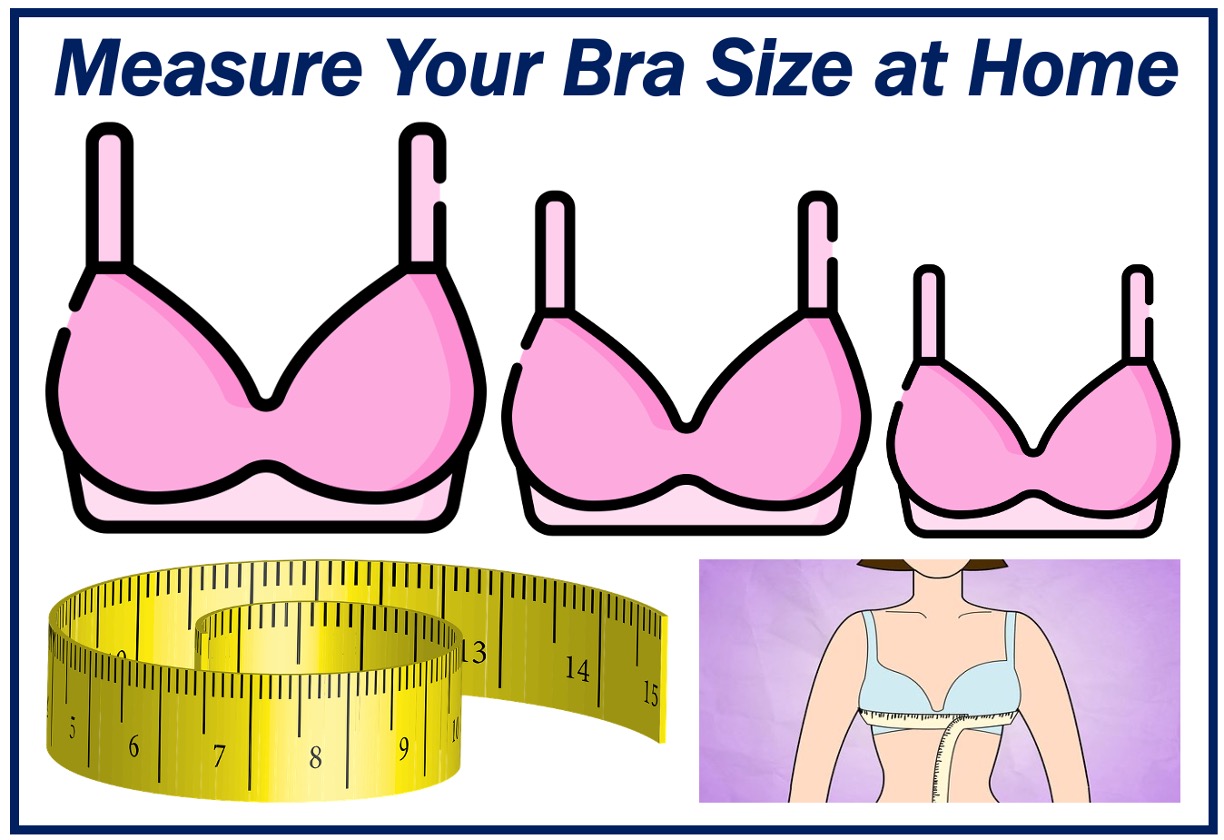
Step 1. What Is Your Band Size?
Take off any bras, and use a measuring tape to measure around your chest just underneath your breasts, around where a bra band would typically sit. The tape needs to be level and snug.
Round to the nearest whole number on the tape. If you find the number is even, you should add 4 inches, but if it is odd, then add five.
Your band size will be the total of this calculation.
This means if your band size measures at 32 inches, you should be buying a 36-inch bra. If the size measures as 31 then you should be buying a 36-inch bra as well.
Step 2. Measuring Your Bust
Now you need to measure your bust as well. You need to wrap the tap around the most full part of your chest, this is usually at the nipples. Wrap this loosely, but not too loose. And then round up to the nearest whole number like you did with the band size.
Step 3. Figure Out The Cup Size
This is the tricky part. You need to calculate your band size. Going from your bus measurement, you need to refer to the cup size charts. The bra size is the band size and cup size.
So if you have a 37-inch bust and a 34-inch band you have a difference of 3 inches which would make you a 34C cup.
Bra sizes are calculated in the difference between the two.
0 inch difference= AA cup.
1 inch difference = A cup.
2 inch difference = B cup.
3 inch difference = C cup.
4 inch difference = D cup.
5 inch difference DD cup.
6 inch difference = DDD/ F cup.
7 inch difference = G cup.
Step 4. Sizing Up & Sizing Down
If you need to go up or down a cup size to get a better fit, this is totally normal.
If you find a 34D is a bit too big for you in the cups then you could try a 36B.
You should use bra sizing charts to ensure that you move up or down correctly. You need to note that bra sizes can change depending on the brand and the type of bra you wear.
Step 5. Making Sure It Is Correct
There are a few tricks to ensuring that the bra you have purchased fits right.
Bend forward at your waist, slip it on and hook it to ensure your breasts are in the cups. Adjust the band, as the back and front should be level.
Check it is not loose, as only one finger should fit underneath, tighten the band and shorten straps to make sure they fit, and then put a close fitting shirt on over your bra. If your cups pucker or if your breasts heave the bra is not the right size!
Ta-Da!